
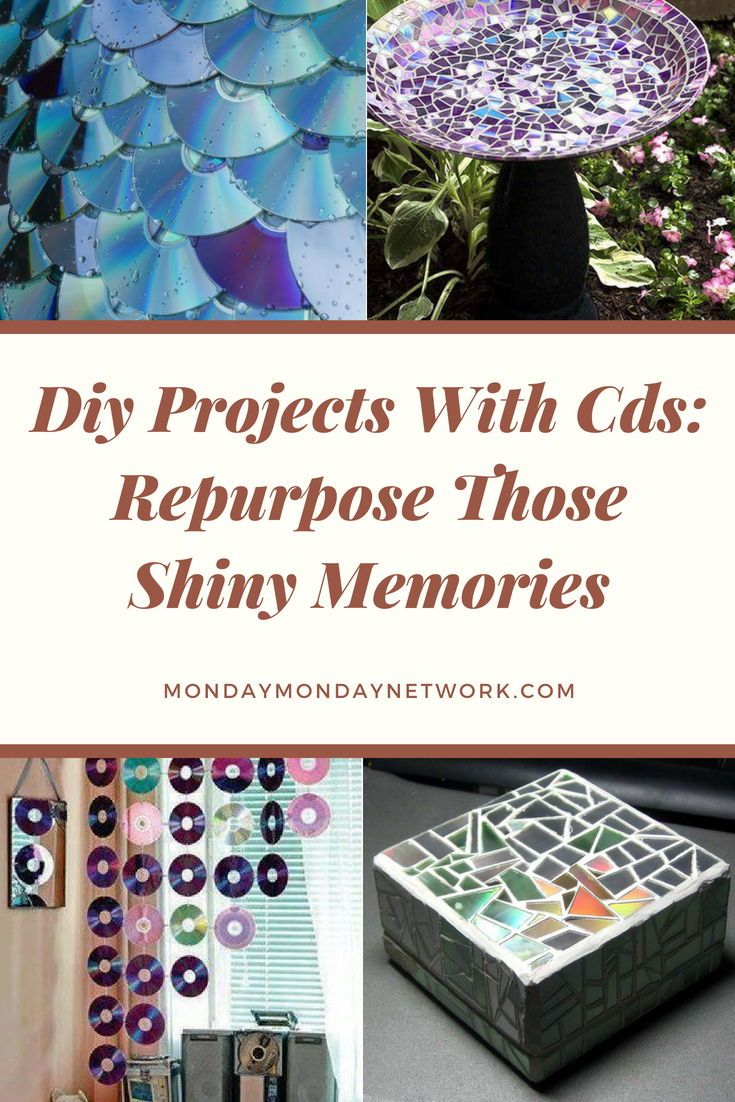
If you have scratched compact disks at home just sitting there, taking up space and becoming an eyesore, these DIY projects with CDs are a perfect way to put them to good use.
DIY projects with CDs are perfect decor because of the reflective property of compact disks. Do note that it can be a tiny bit difficult to cutting them.
They are often used in place of mirrors or other reflective things because they are not as brittle, and are safer for children as their edges are not sharp.
Get your best scissors (make sure they are sharp). Choose the large ones so that it would be comfortable.
DIY Birdbath Projects with CDs 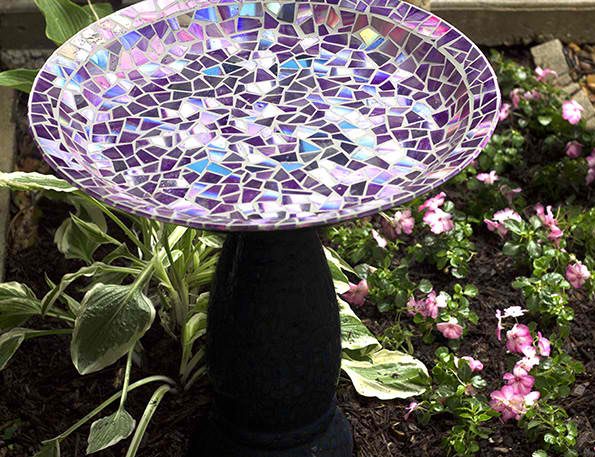 http://www.meandmydiy.com
Give a new life to an old birdbath or transform a plastic or terra cotta clay using old CDs!
Cut CDs into small pieces and glue them on the surface of your birdbath base using waterproof and NONTOXIC glue. Make sure to put small amount so that it won’t cover the top of the CDs.
When you have completely covered the birdbath of the CDs, apply tile grout between the CDs. Wipe the excess carefully using a damp cloth.
Spray a sealant to prevent the CDs from getting mossy and protect them from wear and tear.
Read full tutorial here.
Shiny Stash DIY Projects with CDs  http://ourdailyideas.com/use-old-cds-to-decorate-jewelry-box/
Sometimes you prefer to have a personal stash that’s really not hidden (Huh?). So you want it to be all attention-getting and everything.
Most of the time, this just contains random things. However, if you want your jewelry box to be as flashy as the things it holds inside, decorate your boring box with CDs.
This basically mimics the steps used with the birdbath above. Actually, if you want to cover any surface with pieces of CDs in mosaic style, you just need to arrange and glue them one by one.
The tile grout, in most cases, will prevent scraping any playful hands from scraping the CDs.
There’s a step-by-step instruction here.
DIY Window Decoration with CDs .jpg) http://www.blogterradonunca.com/
http://www.blogterradonunca.com/
Whether you are hoping to display the CD art or their reflective part, this DIY projects with CDs will be perfect for your room.
Using a drill (a hot metal rod will also work), poke holes near the CD’s edge. Next, connect the CDs to each other using paper clips or wires.
After this, hang them on a piece of wood or metal, on your ceiling, or on your wall. You’ll have an amazing decor.
Tip: You can print the covers of your favorite albums or movies on sticker paper and attach them to the CDs to make it look like a collection. You may also do this using regular paper which you will stick to the CD using mod podge.
DIY Projects with CDs: Roofing  http://www.instructables.com/id/CDDVD-Roofing-Concept/
Yeah. For your doghouse or a backyard canopy.
Simply arrange the CDs as if they are roof tiles on a piece of plywood, and nail them on it. You can see how to cover the holes and arrange the CDs here.
It’s up to you if you want the CDs’ art or shiny side to be facing up.
The same process can also be done to decorate your door or headboard. You can also just use it to decorate a plain wall.


 http://www.meandmydiy.com